6 best practices for optimizing image SEO in WordPress

You may already know how search engine optimization (SEO) works and why it is important. However, it is not enough to use keywords in your posts and write catchy meta descriptions . For optimal website performance, you will also need to work on image SEO. In this post, we will take a closer look at SEO for images and how it can improve your WordPress site. Then, we will share some practical tips for optimizing your images.

Let’s get started.

Table of contents view
What is SEO for images?
Images make your site visually more attractive and at the same time break down your content into more assimilable sections. However, photos also contribute to the overall performance of your website.

Whether you are setting up your first WordPress site or conducting an SEO audit , it is critical to spend some time optimizing your images. This process may involve writing alternative text , compressing images or ‘using relevant keywords in file names.

When done well, image SEO can make your content easier for search engine crawlers to understand and can, in turn, increase your ranking in search engine results pages (SERPs). Optimization can also help your photos appear among the top image search results.

Finally, SEO for images can also help you improve the performance and ‘user experience (UX) of your site . For example, compressing your photos and using the correct size can speed up the loading of your website. Since page speed is a ranking factor for Google, this process can further increase your visibility in SERPs.

How does SEO for images improve your site?
As we mentioned, SEO for images can be beneficial to your website. Let’s take a closer look at its impact on your site’s performance. In 2020 Google launched the Core Web Vitals project , a set of metrics that measure website performance and quality. You can test your website with a tool like PageSpeed Insights .

As you can see, images can (and will) affect your site’s score. Your LargestContentful Paint (LCP) score indicates how long it takes your website to load its largest element. In many cases, that element will be a photo.

In addition, PageSpeed Insights can give you some tips for image optimization:

Large image files can slow down your site, which may drive visitors away. Slow loading times can also hurt SEO. Google views loading speed as an indicator of quality. It wants users to be able to find the information they are looking for quickly.

For this reason, image optimization can speed up page loading. This increased speed can lead to better UX, improving your visibility in search engines and impressing your website readers.

SEO for images can also make your website more accessible . This is especially true if you use alternative text to describe your photos. This feature allows users with visual impairments to better understand your images. We’ll take a closer look at alternative text (and other best practices for image SEO) in the next section.

6 best practices for optimizing image SEO
Now that you know a little more about how SEO for images works, it’s time to look at some best practices for boosting your site’s performance. If you follow these six tips for optimizing your images, your site will definitely improve.

  1. Assign descriptive file names to images.
    As mentioned earlier, image SEO allows search engines to understand your images. You can make this process even easier by assigning descriptive file names to your photos.

By default, any photo taken with your camera and transferred to your computer will have a file name similar to this: DSC1234.jpg . This title does not provide any information about the content of your image.

Therefore, before uploading your images to WordPress, you should definitely give them SEO-friendly names. We recommend that you avoid generic file names (e.g., “restaurant.jpg”) and try to be more specific (e.g., “first-dish-at-restaurant.jpg”). This will allow Google and other search engines to index them more easily and display the images in more specific searches.

  1. Compress and resize your images.
    If you have a site with a lot of media, you may want to optimize your images. Large files will put a strain on your server, take up a lot of space in your site’s memory, and load much more slowly than smaller ones.

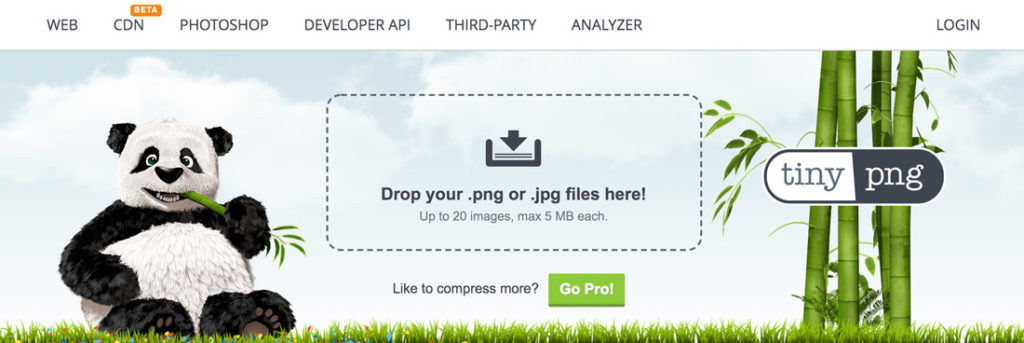
For this reason, we recommend that you compress your images before uploading them to your WordPress site. You can do this by using your favorite photo editor or an online tool such as TinyPNG :

Alternatively, you can install an image compression plugin such as Imagify . This tool will automatically compress any image you upload to your site.

Optimization tools reduce the file size of your images, making your site lighter. There are two main types of compression:

  • Lossy compression : helps you remove large amounts of data from your image files, but can affect the quality of your photos.
  • Lossless compression : reduces image files without affecting their quality.

In addition to compressing your photos, you will also need to use the correct image size on your pages. By default, WordPress generates different image sizes for each photo you upload, including thumbnail, medium, and large.

It makes sense to use the thumbnail version for images in your blog feeds. Similarly, you will need to resize your images when designing web pages or using them in blog posts. Using images larger than necessary will only add an unnecessary burden to your pages.

Also, we recommend that you use the right format for the images on your site, as you may need a small JPG instead of a transparent PNG or animated GIF . You should also try to provide WebP images whenever possible.

  1. Use images in the right context
    To help Google better understand your images, you need to be sure to use them in relevant places in the post. This process involves placing your pictures near contextual content.

For example, imagine you are writing a blog post about the best attractions in Rome In that case, you should place photos of the places or landmarks you mention in relevant sections. As we have done in this article, you can use text to introduce the image you are about to show. However, using these same images of Rome in a blog post about French cuisine that makes no mention of §Italy has the potential to make Google think your content is unreliable .

In addition, you can write captions to make your photos more contextual:

Captions help readers understand what an image represents or where it was taken. This feature can further improve the UX of your site. Alternative text is also an important player in contextualizing your images.

  1. Add alternative text or alt text
    Alt text is perhaps the most important component of SEO for images. It is a piece of text that describes the content of a photo, and search engines use that text to understand what is being shown in images. Therefore, using alternative text can help your content appear in relevant search results.

Alternative text also makes your images accessible to screen readers, tools used by people with visual impairments. If you include alternative text, screen readers can tell visitors what your images represent.

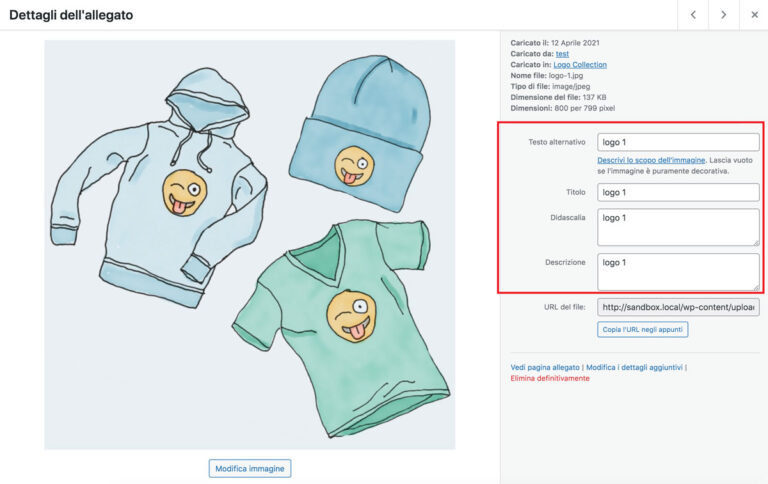
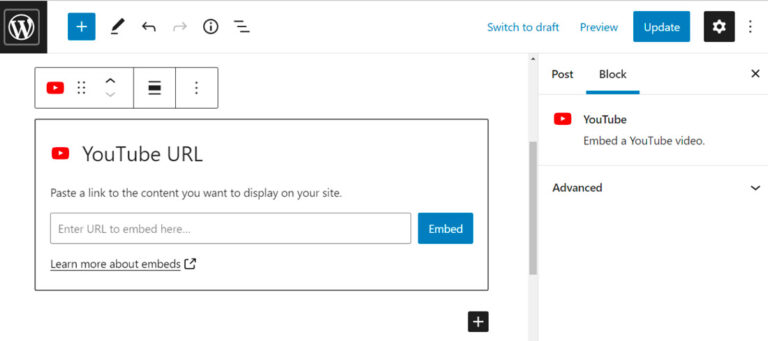
You can add alternative text to an image within the WordPress editor . All you have to do is click on your picture, then access the settings panel to your right. Here you will see a field for alternate text:

To further improve the SEO of your image, we recommend that you be as descriptive as possible in your alternative text. Ideally, you should describe to readers exactly what the image represents in one or two sentences.

  1. Add images to your sitemap
    Google recommends adding your images to an existing sitemap . Alternatively, you can create a separate sitemap just for your images.

Regardless of which option you choose, including images in a sitemap allows Google to discover and index your images. This, in turn, can increase your search engine rankings.

Some optimization plugins such as Yoast SEO automatically add images to your sitemap. Alternatively, you can use a plugin to complete the process. Finally, you could contact a professional service or SEO expert to create a sitemap for your website.

  1. Use relevant keywords in your Pinterest images
    In addition to optimizing the images on your site, you may also want to work on any graphics or photos you post on other platforms. This tip is critical if these images link to your website.

Pinterest is still a great source of referral traffic for many sites. This social media works like a search engine. It allows users to find all kinds of useful content, from fashion ideas and do-it-yourself tips to travel guides and recipes:

Even within Google image searches, you are likely to find images that link back to the Pinterest page rather than the source site. If you add images from your site, we recommend that you save them to relevant Pinterest boards so that you maintain more control over your content. We recommend that you provide an informative title and description for each photo:

It is also a good idea to include relevant keywords in your descriptions and titles. These elements can help make your images more visible when Pinterest users (and Google proxy users) search for particular information.

Conclusion
SEO for images is the process of optimizing your site’s visual files. It can help your content rank better in search engines and improve the performance of your website. You should focus on using descriptive image file names, compressing photos, and adding alternative text. And if you’re active on Pinterest, you’ll also want to use relevant keywords for your photos (and if you’re not on Pinterest, you might consider this because it brings a good amount of traffic to many sites).

Cumulative Layout Shift (CLS): how to correct it in WordPress

Are you having problems with cumulative layout shift (CLS) in WordPress?

Cumulative Layout Shift, or CLS for short, is a user experience-focused metric that is part of Google’s new Core Web Vitals initiative .

If you’ve ever browsed a page that “jumps” as it loads, you’ve experienced the layout shift, and you also know how annoying the cumulative layout shift in WordPress can be. But in addition to annoying your visitors, CLS can also affect your search engine rankings, so it’s important to fix any problems with your site.

Fortunately, you don’t have to be a tech wizard to identify and fix cumulative lyout shift problems. By understanding the causes and knowing how to correct them, you can reduce the number of unexpected changes on your website.

In this article, we will introduce you to Google’s cumulative layout shift metric and show you how to detect CLS problems on your site. Then, we will guide you through three simple ways to fix the problems and reduce your site’s CLS score.

What is cumulative layout shift
Layout shift occurs when page content shifts without user interaction.

A common example is late-loading advertisements, which you have probably encountered on multimedia websites. You may have started reading text on the page only to be “pushed” down by an advertisement that is displayed after the page has already loaded.

Cumulative layout shift is a metric that measures all the layout shift that occurs on the page and puts it into a single score. In general, a high score indicates many layout shifts (not good), while a low score indicates few layout shifts (good). And a score of zero means your site has zero layout shifting problems, which is perfect.

As you can imagine, moving elements around can generate headaches for your users. there is a risk that they will inadvertently click on a part of your page or even accidentally make a purchase.

Although there are no direct consequences, many layout changes can be visually annoying. They can also slow down loading times. This seemingly minor problem can have serious repercussions on the user experience (UX) of your audience .

Unfortunately, the problems with a high Cumulative Layout Shift score do not end there. Cumulative Layout Shift is also part of Google’s new Core web Vitals initiative. Starting with the Google Page Experience update, your site’s Core web Vitals scores are now an SEO ranking factor, which means that problems with CLS can affect your site’s ranking .

How to identify problems with cumulative layout shift in WordPress
To find out your site’s Cumulative Layout score and identify problems, we recommend using PageSpeed Insights . It will give you your site’s overall CLS score, but it will also go deeper and flag specific layout shift issues that are causing problems.

To begin, enter your URL in the box and click Analyze . The process should take only a few moments. When you receive the results, scroll down to and look for your site’s cumulative lyout shift score:

From here, you can determine your site’s performance in this area. As a rule of thumb, there are three potential ranges into which your CLS score can fall:

  • Good , which is 0.1 or less
  • OK , which is between 0.1 and 0.25
  • Bad , which is 0.25 or more

Since this metric directly affects the optimization of your Core web Vitals , you should try to aim for as low a score as possible. For more specific suggestions on how to do this, you can scroll down to the Diagnostics section and look at Avoid Significant Layout Changes . This section will list individual layout changes on your site:

This information can help highlight specific areas of your site that may need some work. Once you’ve identified the problem, you can apply some simple methods to fix it.

How to fix cumulative layout shift in WordPress (3 ways)
Let’s take a look at three effective ways to fix CLS problems. These methods are most effective when used together, so we encourage you to try each approach.

  1. Add dimensions to your images, videos, and ads
    If you have different media on your website, chances are that each image and video will have different sizes. This is probably unavoidable, regardless of the type of site you run.

In essence, this variance has no direct impact on your CLS score. However, it still poses a threat: if you do not specify the size of the article, you can run into problems.

Adding dimensions is essential because it provides vital loading instructions to browsers. Size information helps browsers reserve the correct amount of space for that resource.

If the browser is unable to do this, it may be predicting the wrong amount of space. As a result, there may be corrections after the page has loaded, leading to a shift in layout. The same principle applies to ads or any material embedded in your site.

Fortunately, recent versions of WordPress largely take care of this problem. If you insert an image via the WordPress editor, WordPress will automatically handle defining its dimensions for you. You can see the results by selecting any media:

Se aggiungi immagini manualmente con il codice o tramite un plugin, assicurati che le dimensioni dell’immagine siano presenti.

Un altro problema con il CLS su WordPress è la pubblicità. Se inserisci annunci pubblicitari nei tuoi contenuti , dovrai assicurarti di riservare spazio a tali annunci per evitare CLS.

Un modo per farlo è applicare le proprietà CSS min-height e min-width al contenitore

che contiene il tuo annuncio: Google ha una guida su come farlo .

Se ad esempio, visualizzi un annuncio 300x250px all’interno di un div con l’id in-content-ad, puoi prenotare spazio utilizzando questo codice:

INSERIRE IL CODICE DELL’ANNUNCIO QUI

Alcuni strumenti pubblicitari potrebbero anche offrire strumenti per aiutarti a raggiungere questo obiettivo. Ad esempio, se utilizzi Google Ads , Google fornisce un editor di annunci per aiutarti in questo.

  1. Preload your fonts.
    Just as with media, your site probably uses different types of fonts. This means they can also take up varying amounts of space. Unlike media, however, you cannot set exact sizes for fonts.

Instead, the solution is to preload these resources. Preloading fonts signals to browsers that it should be one of the first things it generates for a given page. By including fonts first, you eliminate the need for corrective shifting.

This method can be especially critical if you use many custom WordPress fonts . These can vary greatly in size from normal fonts, which means that this simple change can have a big impact. However, even less font-dependent sites are likely to experience at least a slight improvement in CLS score.

Many WordPress performance plugins include options to preload fonts. For example, Autoptimize, Asset CleanUp, Perfmatters, and WP Rocket.

For most people, using one of these plugins is the easiest way to preload WordPress fonts.

More advanced users, can also preload fonts with custom code snippets. To add this code snippet, you will need to edit the file header.php your child theme . You can edit this file by going to Appearance > Theme Editor > Theme Header on your WordPress site:

After editing the header.php file in your child theme, scroll to the bottom of the page, then copy and paste the following line of code, making sure to replace the sample font link, roboto.woff2 in this example, with the actual link to the file font you are using on your site:


When you are ready, click Update File to save your changes. That’s all you have to do: now your website fonts will have priority loading in browsers.

  1. Optimize your dynamic content
    Finally, let’s talk about your site’s dynamic content. Dynamic content such as newsletter sign-up forms , app installation requests, GDPR notices, and so on can all cause layout changes by adjusting the browser again after the page is almost fully loaded.

However, this only applies to dynamic content that is not triggered by user interaction. For example, if you are loading an automatic notification bar to greet people on your home page, this could hurt your CLS score.

There are two ways to solve this problem:

1.Activate dynamic content only after user interaction, which will not affect your CLS score. For example, instead of showing the email activation form right away, you could activate it when a user clicks a button to create a two-step consent.
2.Use CSS to reserve space for dynamic elements, similar to what was discussed above. For example, if you use CSS to reserve space for the notification bar at the top of the page, you can still load that bar without causing the layout to shift.

Fix CLS in WordPress Forever.
If you want to create a good user experience and improve your score in Core web Vitals, it is important to have a low Cumulative Layout Shift score. Fortunately, preventing this annoying problem is not difficult. You can correct your site’s loading problems by paying attention to a few simple settings.

In this article, we covered three ways to correct and reduce cumulative layout shift in WordPress:

1.Make sure all your media and ads have clearly defined dimensions. WordPress will automatically handle the images you embed in the editor, but you may have to manually define sizes for ads and any images you add outside the editor.
2.Preload your fonts to avoid last-minute changes.
3.Pay attention to how you implement dynamic content, requiring user interaction or reserving space for any dynamic elements.

What is the difference between lossy and lossless data compression?

The use of images can enhance the content of your website. However, file compression is critical to prevent them from taking up unnecessary disk space and hurting your site’s performance. To ensure that you are properly optimizing your images, it helps to understand the difference between lossy vs lossless (lossy and lossless) compression.

In this post, we will start by explaining both clossy and lossless compression. Then we will discuss when to use lossy vs lossless data compression on your WordPress site.

Let’s get started!

Table of contents displays
What is lossy compression?
Lossy compression reduces file size by removing as much data as possible. As a result, it can cause degradation that reduces image quality. In any case, most of the lost information should not be noticed by visitors when using a balanced compression ratio.

Lossy compression has been developed for a variety of file formats. It is most commonly associated with JPEG (Joint Photographic Experts Group) and Graphics Interchange Format (GIF) formats . You can also use this compression method for audio and video files as well.

Below is an example of an image before and after lossy compression. On the left is the original at 389 KB. The image on the right has a 95% reduction in size:

As you can see, there is no visible difference in appearance, despite the significant reduction in file size. However, different levels of compression can affect the quality of compressed images.

The same principle applies to audio files. For example, you can use loossy compression to reduce the size of MP3 files. However, this may reduce the quality of the audio.

Pros and cons of lossy compression
The main advantages of lossy compression are data elimination and size reduction. Creating smaller file sizes can improve the performance and loading time of your site. In turn, this can improve your user experience (UX) and search engine optimization (SEO) .

On the other hand, there are some drawbacks of lossy compression. First, you cannot restore files to their original form. In other words, the process is irreversible. In addition, the deletion of data can affect the quality of the image.

Lossy compression is a trade-off: the smaller the file size, the greater the performance. However, the more data that is lost, the more the image quality will suffer.

What is lossless compression?
Unlike lossy compression, lossless compression does not remove critical data from the image file. Instead, it removes metadata and non-essential information that does not affect the appearance or quality of the image. Although this compression method can help reduce file size slightly, the difference is usually not significant.

Two popular file formats associated with lossless compression are zipped archived files (ZIP) and Portable Network Graphics (PNG) images. Lossless compression has been developed for text, images, and audio. In fact, some of today’s largest streaming services, such as Apple Music and Spotify , use lossless compression for audio files.

Pros and cons of lossless compression
The main advantage of lossless compression is that you don’t have to worry about degrading the quality of an image or making it look pixelated. Also, unlike lossy compression you can restore an image to its original format without any loss of data.

However, there is a significant downside: lossless compression has a lower data retention capacity. Since this compression method does not reduce the size of the data, you will not save as much storage space.

When to use Lossy vs Lossless compression on your WordPress site.
The best compression method for your website depends, in part, on the file formats you use . For example, PNGs are best suited for logos, illustrations, icons, and text with transparent backgrounds. However, most standard images on the web are JPEGs.

We recommend that you use lossless compression for PNGs. In contrast, lossy is more suitable for JPEGs.

WordPress automatically compresses JPEG images (reducing the file size to about 82%) when you upload these images to your media library. You can adjust this level of compression by editing your functions.php file . In any case, we do not recommend this method unless you are familiar with the code.

Regardless of the default settings, you can further optimize your files with lossy or lossless compression. You can use image editing software such as Adobe Photoshop or a WordPress image optimization plugin such as Imagify , WP Smush or ShortPixel .

You can also use a free online tool such as TinyPNG :

Now that we better understand lossy vs lossless compression, it’s time to analyze when it’s best to use each method on your WordPress site. As we have seen, both types of compression have unique advantages and disadvantages.

When to use lossy compression in WordPress
If disk space and bandwidth are among your biggest concerns, it is best to use lossy compression. To speed up your site, Google recommends lossy compression via a WordPress plugin. You can also use GZIP compression to further reduce your files.

In most cases, we suggest using lossy compression for WordPress images. The loss of data is largely unnoticeable, but it can greatly improve loading times. Therefore, this method is ideal for e-commerce shops, portfolio sites and blogs.

Lossy compression can optimize images and product thumbnails in your shop. You can also use it for blog posts and pages with illustrative photos.

Again, depending on the level of compression used, there is usually not a noticeable difference in quality unless you enlarge the images. Also, you can usually choose the level of compression.

The Imagify plugin, for example, allows you to select the optimization level based on how aggressive you want the compression to be:

Lossy compression is best for WordPress images because most people will not see the reduction in quality. Our eyes have varying sensitivity to colors and brightness . Compression algorithms take advantage of the way humans process images to make data removal and quality reduction almost undetectable.

When to use lossless compression in WordPress
Generally, lossless compression is best for images with heavy text and images with transparent backgrounds. We recommend it for RAW, BMP, GIF and PNG file formats.

If image quality reduction is an issue, you may be better off opting for lossless compression. It will keep your images looking sharp while also reducing file size.

Lossless compression might also make sense if your site relies heavily on visual content, such as a photography website. In that case, you can optimize your images and site performance by using other methods, such as leveraging a content delivery network (CDN) .

Conclusion
Optimizing image files is an effective way to improve the speed and performance of your WordPress site. However, it can be difficult to decide between lossy and slossless compression. On the one hand, you probably want to save disk space. On the other, you won’t want to harm the look and quality of your content.

As discussed in this post, both lossy and lossless compression have advantages and disadvantages. We recommend lossy compression for most Web sites because it can significantly reduce file size without removing any obvious data. However, lossless compression may be better if you are more concerned about image quality than loading times.

How to diagnose and restore a hacked site: complete guide 2022

The rapid evolution of technology coincides with the growing number of cybersecurity threats. With 30,000 websites victims of hackers every day, there is no guarantee that your website will not be next.

If your site has already been hacked, be sure to fix it as soon as possible. By doing so, you will minimize the damage that could include loss of reputation and brand revenue, lawsuits, and plummeting positions in search engine results (SERPs).

This article will discuss the symptoms of a hacked site and how to fix them. You will also learn some ways to protect your website from future attacks and the best way to communicate the security incident to your visitors.

Let’s get started.

Table of Contents displays.
How to check if your site has been hacked
Before you take action to clean up your website, you need to be sure that it has been hacked.

The signs that a website has been hacked vary and may even be invisible, depending on the type of attack. The following is a list of common indications that a site has been hacked:

  • Alerts about hacking from browsers and search engines.
  • Links redirecting to suspicious websites.
  • High volumes of traffic from other countries.
  • Damaged or broken web pages.
  • Slower than usual loading time.
  • Alerts on Google’s blocklist.
  • Emails sent end up in spam.
  • Removal of the website by the hosting provider.
  • Unsavory ads.
  • WSOD (White Screen of Death).
  • Random code snippets displayed in the header or footer.

To confirm your suspicions you have several website checkers such as Sucuri SiteCheck , DeHashed and Have I Been Pwned? We recommend checking your website with more than one tool to receive more accurate results.

10 steps to restore a hacked site
After you have confirmation that your site has been hacked, take action to fix the problem. The following steps will guide you through the process of restoring and fixing your hacked site.

  1. Keep calm and don’t panic
    There is no reason to panic: hacked sites are generally recoverable. Reacting emotionally without calmly assessing the situation can lead to more harm than good.

Therefore, remain calm and proceed to the next step.

  1. Change your passwords and verify access
    Brute force attacks are some of the most common cybersecurity threats . Hackers try to guess your administrator account password using various combinations of letters and numbers.

Changing all your passwords will revoke hackers’ access to your website and prevent them from compromising other accounts and causing further damage.

Here is a checklist of accounts whose passwords you should reset at the first opportunity:

  • Hosting account.
  • FTP account (primary and secondary).
  • Content management system (CMS) administrator account.
  • Database (via the database connection file).
  • E-mail accounts associated with the hacked site.

In addition to changing all your passwords, we also recommend that you review the access privileges of website users. If hackers are able to get into the site using an administrator account, they will have full access to all administration features.

If the hacked site is hosted on WordPress, check existing user roles and permissions by accessing Users from the admin dashboard. Review accounts with super administrator and administrator roles as they have the highest level of access privileges.

Follow the same procedure on platforms that grant access to multiple users, such as the hosting control panel and FTP system .

Set appropriate permissions for your Web site files, particularly those in the root directory ( usually public_html ) such as the wp-admin folder and the wp-config.php file via the Web hosting’s File Manager . This will prevent unauthorized users from accessing, modifying and executing existing files.

Pro tip.
Use a password manager to manage password saves. Take advantage of the built-in password generator that is generally provided to create reliable passwords.

  1. Create a backup of your website
    Your website may have been hacked, but it is still functional and contains all important data. By downloading a backup of the website , you will be able to reload this version of the website and repeat the cleaning process if it fails the first time.
  1. Track your actions
    Most hacking attempts occur after a website has undergone some changes, creating new vulnerabilities to exploit. By tracking your actions, you should be able to identify the source of security problems much more quickly.

Narrow the time window by checking your web logs for a sudden spike in traffic. Then, inspect your access logs and error logs through your hosting control panel to identify any suspicious activity or errors that occurred within the suspicious time period.

After calculating the time when the hacking occurred, review all changes made before. In WordPress, malicious code usually enters the site through new files introduced by plugins, themes, and WordPress installations.

  1. Investigate recent online breaches
    Even popular software can suffer security breaches. Keeping up to date with cybersecurity news will help you find vulnerabilities much more easily and remove malicious code before it can devastate your website.

Here are some of the best cybersecurity websites recommended by cybersecurity experts:

  • Hacker News – provides news about hacking.
  • WP Hacked Help Blog – offers tips on WordPress security and restoring hacked sites.
  • Daniel Miessler – publishes articles and tutorials on website security and technology in general.
  • IT Security Guru – focuses on cybersecurity, cybercrime and ransomware.
  • Security Weekly Blog – provides weekly cyber security updates in the form of live streaming.
  1. Contact your hosting provider.
    If your hacked website is running on shared hosting, the source of the security problems could be from another website on the same shared server. In this case, cyber attacks could also target your hosting account.

Contact your hosting provider to see if other websites on the same server were also attacked.

Most web hosts also provide users with access to web logs, allowing you to monitor visits. If server access logging is disabled by default, contact your hosting provider or enable it manually.

  1. Investigate with Google Blocklist and Spam Blocklist.
    If Google detects suspicious or dangerous activity on a website, the search engine is likely to block it. When a website is blocked, it will not appear in search results to protect visitors from potential malware.

Check to see if your website ends up on Google Blocklist using Google Search Console . The alert will appear in Security Issues under Security and Manual Actions .

Google Safe Browsing is another tool you can use to check the status of your website. It will let you know if the site is safe to visit.

If you do not have access to the DNS zone , examine your website traffic through Google Analytics . Having a sudden drop in traffic will be a solid confirmation that Google has blocked your website.

In addition to Google Blocklist, your website may also appear in the anti-spam database. Internet service providers, email providers and anti-spam platforms use spam blocklists to prevent spam emails from entering their system. Emails from IP addresses listed on this blocklist will be blocked or end up in the spam folder.

Clarify whether your domain is listed on the spam block list using domain integrity checking tools such as MxToolBox and Domain DNS Health Checker . In addition to providing detailed information about the status of the domain, these tools can identify problems related to the web server, mail server, and DNS.

  1. Reset your .htaccess file.
    .htaccess is a file that contains high-level configuration settings for a website hosted on Apache web Server. For this reason, .htaccess is a popular target of cyber attacks.

Some of the most common .htaccess file exploits include:

  • Redirect from search engines to malware.
  • Redirect from error pages to malware.
  • Malware attached to PHP files.
  • Revealing ‘information.
  • Browser fingerprinting.
  • Watering hole attacks.

Disabling and restoring the .htaccess file to its original version may help solve the security problem. Also, change its file permissions so that only certain users can access it.

What is a WordPress theme: the different types of themes and how to choose one

If you use WordPress as a content management system (CMS) , you have probably already encountered the term “WordPress theme.” Themes play a crucial role in the overall appearance of a website and help you create a good-looking site without having to use a lot of code..

With the right theme, WordPress users can customize their web design elements, including color and typography, to reflect their brand personality.

This tutorial will explain what a WordPress theme is and how it is different from a template. You will also learn about the different types of themes and how to choose the right one for your WordPress website.

Table of contents displays
What is a WordPress theme?
A WordPress theme is a collection of files that form the basis of your site’s appearance, including page layouts, style sheets, and sidebar placement. These files will determine how your blog posts and pages will appear to website visitors.

What can a WordPress theme do?
WordPress themes help site owners create a website without using code to make it from scratch. You can simply activate a theme from the WordPress directory or purchase it through a third-party store and upload the file to your WordPress admin area.

A theme can drastically change the design of your site with theme features such as:

  • Navigation menus.
  • Custom headers.
  • Custom backgrounds.
  • Sidebars.
  • Post format.

A new WordPress website comes with a default theme installed that is simple and lightweight. You can use it or change it to a free or premium theme.

Note that design elements may change significantly once you replace the WordPress themes since each one often has a specific style and purpose. For example, some might be better suited for complex business sites, while others are perfect for simple portfolio sites.

By default, users can only activate one theme at a time. To activate multiple WordPress themes , install a plugin such as Multiple Themes..

Unlike a WordPress plugin that adds a specific feature to a site, a theme should not have crucial functionality . Therefore, users will not lose a critical feature if they change the theme.

What is the difference between a WordPress theme and a WordPress template?
The difference between WordPress themes and templates is the number of pages you can apply them to. A theme controls the appearance of an entire site, while a template defines a single-page layout.

Two required WordPress theme files are:

  • Index.php – the main WordPress template file.
  • Style.css – the main style file.

A theme folder can also include additional files, such as:

  • PHP files, including template files for creating classic themes.
  • Blocks and HTML files for developing block themes.
  • CSS style sheet.
  • Graphics.
  • JavaScript.

Some WordPress themes offer multiple template files for further customization within the overall theme. For example, a theme may contain two landing page templates, a full-width version and a reduced-width version, or have a different look and feel for blog and portfolio pages.

Types of WordPress themes
There are over 9,000 free themes in the WordPress theme directory alone, not to mention those available on marketplaces.

To help users filter themes based on specific needs, the WordPress directory categorizes its themes into:

  • Layout : classifies themes according to a page format, such as a three-column or grid layout.
  • Functionality : refers to the specific attributes that many people look for in a theme, such as RTL language support and footer widgets.
  • Subject matter : groups themes according to their purpose and niche, such as portfolio and education themes.

In addition to these categories provided in the filter function of the WordPress directory, we will look at other types of WordPress themes in more detail below, starting with free and premium themes.

Free WordPress themes and premium themes
Independent developers and high-end vendors typically create free WordPress themes as a temptation for their premium packages.

They are an excellent option for users on a budget. In addition, they are available in the WordPress.org theme directory where they are required to pass a rigorous review process . As a result, users can be assured of quality and safety.

Free WordPress themes are also easy to access as users can browse and activate them directly from the admin dashboard..

One of the main disadvantages of free WordPress themes is their limited support, both in the form of documentation and direct communication with the creators. Some developers provide support via WordPress forums, but they are not obligated to do so.

This can be a problem if you need to fix a bug or change an element in the theme.

Another drawback is their lack of uniqueness. Free WordPress themes are widely available and have limited customization features, which may make your site design generic and require some code knowledge or a page builder to customize it.

Unlike free WordPress themes , the premium version is available for purchase on third-party WordPress theme stores, such as:

  • Elegant Themes
  • StudioPress
  • Themeforest
  • Mojo Marketplace

Alternatively, you can purchase buy buy a premium theme directly from theme developers, such as aThemes or ThemeIsle . Dedicated developers typically have multiple themes and often provide top-notch customer support. However, they may not display user ratings as in a theme marketplace or WordPress theme directory.

Here are some of the major benefits of using premium WordPress themes:

  • Advanced features : include custom content and graphics, as well as search engine optimization (SEO) features.
  • Unique design : choose from several customization options, including built-in drag-and-drop builders, multiple templates and extensive color choices.
  • Regular support : contact via forum, email or phone.

However, advanced features in premium WordPress themes can weigh down the code, overload the server and affect loading speed. Their price can also be relatively high and they may still require an additional monthly or annual fee.

Multipurpose and niche themes
A multipurpose theme serves various uses and niches. It usually includes several extensions, widgets and pages to provide more options for users to customize sites, regardless of industry.

One of the most popular themes that fall into this category is Divi .

It is not only great for a blog or portfolio theme, but also for a WooCommerce theme because of its specific features.

In parallel, a niche theme often targets specific industries or topics, such as blogs and entertainment or eCommerce sites.

The features or customization choices in niche themes generally are not as many as multipurpose themes, but they have the exact requirements for your specific needs.

Personalias is a great example of this category. This blog theme has a minimal and elegant design, a grid layout, and a sidebar for comments and recent posts.

Parent themes vs. child themes
A parent theme refers to a complete theme that includes all the required templateWordPress files.

Otherwise, a child theme or child theme inherits the main features and appearance of the main theme, but allows developers to modify it without altering the main theme.

WordPress theme developers will tell you if a theme is a child theme in the description and label it “This is a child theme of X” in the sidebar, as in the example below.

Custom Themes
A custom theme is an excellent way to achieve a unique look and feel, such as animation and 3D integration. It is often suitable for specific websites such as ecommerce.

Several factors can contribute to the cost of a custom theme, such as the timeline of the project and the location of the developer. However, the price can start from $1,750 for a standard custom theme to $25,000 for a project with complex features.

How to choose a WordPress theme?
Here’s what to look out for when choosing the right theme for your WordPress site:

  1. Understand your needs
    The first step in choosing an ideal WordPress theme is to decide the purpose of the website, whether it is a simple blog , a digital portfolio or an online shop .

Each of them will need different features and layouts. A photography portfolio for example might require a gallery layout and animations to attract customers, while content-focused sites might be better with a minimalist design.

Create a list of what you want to include in your site. Some features to consider for a WordPress theme are:

  • Social media widgets
  • Accessibility
  • Translation support
  • Contact form on the homepage
  • Comments section or forum
  • E-commerce compatibility

Next, list your preferred site design options, such as layout and editor styles. Many WordPress themes are customizable, but we recommend choosing the one that reflects your brand image for a faster development process.

A great tip is to check out demo sites for a WordPress theme. Click the Homepage link of the theme in the official directory if you decide on free WordPress themes. Then, click on the View Demo Sites button . Keep in mind that on other websites this button may have a different name.

Here you can estimate what your WordPress site will look like as it contains demo content, including page layout, custom widgets, and plugin support.

Also, list existing WordPress websites and their features you like, then use a tool like What WordPress Theme Is That? to find out what WordPress theme and plugins they use.

  1. Check the Customization Options.
    Sometimes, users may find a theme suitable for their brand, but still want to customize it further to ensure that each page shows their personality.

One way to check the customization of a theme is to install the theme, go to Appearance -> Themes in the WordPress dashboard, and click on Live Preview .

Next, you should see the WordPress theme customization dashboard and theme customization features in the left sidebar

Advanced users can use more comprehensive customization options as they can edit WordPress theme files from the administration area using the ‘Theme Editor .

Visiting the theme website is also a great way to learn about available customization options. For example,

Some popular WordPress themes such as Themify and Divi themes have built-in theme builders, so check out these tools for better alignment and understanding of customization options.

How long should a blog post be? Here’s what the data says

Regularly writing high-quality content is an effective way to increase your visibility in search engines. However, the length of your articles can also affect your rankings. So, you may be wondering: how long should a blog post be ?

By looking at some recent studies on search engine results, you can determine the ideal length for your blog posts. This knowledge can help you improve your overall search engine optimization (SEO) strategy .

In this post we will discuss the ideal length of blog posts for SEO, based on recent data. We will then offer some tips to help you break down long articles and make your content more engaging.

Let’s get started!

Table of contents hides
How long should a blog post be?
What research says about article length
How to write engaging posts with a high word count (4 tips)

  1. Focus on the search intent
  2. Prioritize quality over quantity
  3. Break the content down into digestible pieces
  4. Use images and other media
    Conclusion
    How long should a blog post be?
    The length of a post is often determined by the topic or type of content you publish. For example, an in-depth article on digital marketing will naturally require more words than a quick update post. NDiversely, the length of a practice guide will depend on the number of methods or steps involved.

Your target audience also plays an important role in determining the length of a blog post. If your readers are looking for a quick solution to a WordPress-related problem , you will need your content to be short and to the point. On the other hand, if your audience is interested in comprehensive guides or tutorials, you’ll want to provide as much information as possible.

Translated with www.DeepL.com/Translator (free version)

It is also important to consider SEO. Yoast SEO, for example, recommends a minimum of 300 words for a regular post.

For core content (the main pages and posts you want to be viewed by all visitors), the minimum recommended word count is 900 words. If your posts are too short, search engines such as Google may see them as poor content . These are posts that provide little value to readers and are therefore ignored (or even penalized) by Google.

At the same time, if your posts are too long, they could have a negative impact on your user experience (UX) . Some visitors may be put off by long articles, especially if they cannot find the answer they are looking for in the first few paragraphs.

What research says about article length
Google regularly releases updates to its algorithm. These are designed to improve the quality and relevance of search results and normally target factors such as a site’s user experience. In addition, Google pays attention to the quality of your content.

In the past, Google favored long-form articles with a word count above 3,000 . However, some recent data suggest that the search engine is now prioritizing shorter content.

Backlinko recently analyzed 11.8 million Google search results and found that the average Google first page result contains 1,447 words . However, other sources recommend a higher word count.

According to HubSpot’s data, the ideal word count for a blog post is also slightly higher, around 2,250-2,500 words . HubSpot found that articles of this length had the most organic traffic and attracted the most backlinks.

On the other hand, Google has often said that word count is not a ranking factor. In an SEO Mythbusting video , Martin Splitt, a Google developer advocate, states that the goal should be to satisfy the user’s query intent, regardless of whether it requires 50 words or 2,000.

If the top results for a particular search query are about 2,000 words long, this suggests that it is the ideal word count to meet the user’s intent. Therefore, instead of setting a fixed word count for all your posts, you may want to allow some flexibility.

The length of your blog post will likely be determined by the nature of the article and the user intent you are trying to address. When writing new content, therefore, we suggest you check out the main competitors for your target keyword and aim to create something of similar length.

Translated with www.DeepL.com/Translator (free version)

How to write engaging posts with a high word count (4 tips)
As we have seen, high-yield posts often fall in the 1,500- to 2,500-word range. This suggests that long posts can help you drive more organic traffic to your website.

However, the length of your article is only one aspect to consider. Let’s take a look at some tips to help you produce better content for readers and search engines.

Focus on search intent
Prioritize quality over quantity
Break your content down into “digestible” pieces
Use images and other media

  1. Focus on search intent
    As mentioned earlier, Google tries to show the most relevant content for a given search query. This means that in order for your content to perform well in search engine results pages (SERPs), it must meet the ‘search intent . This term refers to what users are trying to find when they type in a particular keyword or query:

For example, if you are targeting the search term ” how to create a website,” your post should ideally contain a step-by-step guide that walks readers through the entire process. This may require more words than the average post, but it may be necessary to fully meet the user’s intent.

Otherwise, if users want to know ” what is cloud hosting? “, you might answer that question with a shorter post. In this scenario, a brief overview or explanation may be sufficient to satisfy the user’s search intent.

  1. Prioritize quality over quantity
    Google may not directly take length into account, but prioritize quality content. According to the Webmaster Instructions , pages should provide useful and accurate information and contain relevant keywords.

We have already reviewed the importance of addressing users’ intentions. However, there are other things you can do to make sure your articles meet Google’s quality standards. For example, you can:

  • Make sure your posts provide value to your readers.
  • Avoid black hat practices such as keyword stuffing and duplicate content.
  • Include links to related posts on your blog and link to any relevant sources.

Backlinks are another indicator of a page’s quality. However, getting links from third-party websites can be a bit difficult, especially if you are not familiar with the blogs where you would like to post.

Therefore, you might consider guest posting on other blogs. For example, you could contribute an informative article that contains a link to a relevant post on your website. Ideally, you will publish your content on authoritative websites with large amounts of traffic.

Quality content can help you build authority and credibility in your niche. This can help you climb the rankings on Google and expand a loyal readership or customer base. Therefore, you may want to focus your efforts on your page content rather than word count.

  1. Break your content down into digestible chunks
    If you are writing long posts, you may want to make sure your content is easy to read and follow. Large portions of text can easily discourage readers, especially if they are reading your post on a small screen. This can have a negative impact on your conversions and your SEO.

The trick is to break up your content into small, digestible sections. Let’s take a look at some effective ways to do this:

  • Use shorter sentences and shorter paragraphs.
  • Divide your content into multiple sections, using H2 headings for main topics and H3 – H6 for subtopics.
  • Incorporate elements such as lists and quotes to add some variety to your content.

If you use the Block Editor , you can use the Separator or Cover block to create breaks between large sections:

These tips can be especially useful when writing cornerstone content. Cornerstone articles are generally longer and more detailed than regular posts. They also contain links that direct users to other posts and pages on your site.

Therefore, we recommend that you make sure these important articles are easy to follow. This will encourage visitors to read the entire post (or at least browse through it) and click on the links within.

If you use Yoast SEO, the plugin can give you some tips to improve the readability of your posts. For example, it will let you know if your sections or sentences are too long:

When writing in-depth articles, such as core content, do not limit yourself to word count. You should provide as much information as possible, using as many words as necessary. As long as they are also clearly structured, these pieces can help reduce bounce rates and increase engagement (including click-throughs).

  1. Use images and other media
    When used properly, images can help make your content more interesting and engaging. You can also use them as separators between the main sections of your post.

Long-form articles may require more photos. However, including many media files can slow down your pages, which can result in a higher bounce rate. Therefore, we recommend compressing all the images you use in your articles.

Also, we recommend that you add alternative text to your images. This helps communicate the content of your pictures to users with screen readers and thus makes your website more accessible:

Alternative text also provides search engine crawlers with additional information about your content. This allows them to properly index your images, which can help improve the ranking of your posts.

In addition, you could incorporate a relevant video into your content. This can be especially effective if you are writing a long tutorial. For example, you can demonstrate the troubleshooting process in a short clip that accompanies written instructions.

As with images, videos can slow down your pages. So instead of uploading them directly to your website, you may want to embed videos in your post .

For example, you might upload your videos to your YouTube channel and then use the YouTube block to embed them in your articles:

A healthy mix of media and text can help improve the user experience. This can lead to better rankings for your long-form content..

Conclusion
Recent data show that the top results on Google’s first page tend to be long-form articles with word counts between 1,500 and 2,500 words.

However, Google has often said that it does not consider article length as a ranking factor. Rather, its focus is on the relevance and quality of the content. So the short answer to the question “how long should a blog post be” is as long as it needs to be .

In this post, we shared some tips for writing long-form articles that work well:

1.Focus on the user’s intent and respond in the best way possible.
2.Prioritize quality over quantity by providing valuable information to your readers.
3.Break your content down into digestible chunks to improve readability.
4.Use images and other media to make your longer posts more engaging.